Having trouble with your Bluetooth headphones even though they are connected to your PC? This article outlines 6 fixes that should solve the problem.
Our various pieces of tech are great when they work, but every now and again issues rear their ugly head and we become nostalgic of the good ol’ days of carrier pigeon.
Issues with Bluetooth connectivity are one of the most frustrating. Especially when your PC is indicating that everything is connected, but you are sat there in silence staring blankly at the screen wondering what the problem is.
There are 6 fixes you can try if your headphones aren’t working despite showing as being connected to your PC.
- Enable Bluetooth Support Service
- Set your default playback device
- Check your volume levels
- Update your Audio Driver
- Run your Troubleshooting tool
- Check audio problems in Device Manager
Let’s get started!
Enable Bluetooth Support Service
The Bluetooth Support Service allows Windows to discover and pair with Bluetooth devices. If it has been disabled, then this could be the reason that your headphones are not working properly.
To activate Bluetooth Support Service, follow these steps:
STEP 1: On the keyboard, press Windows Key+R to launch the Run dialog box.
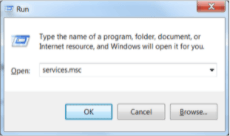
STEP 2: Type services.msc then hit Enter.
STEP 3: Once you hit Enter, this screen will show:
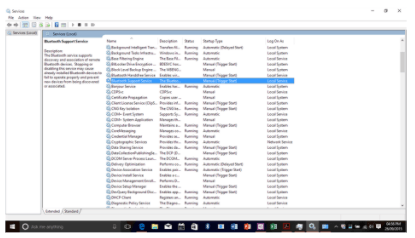
STEP 4: Double click on Bluetooth Support Service and the screen below will show.
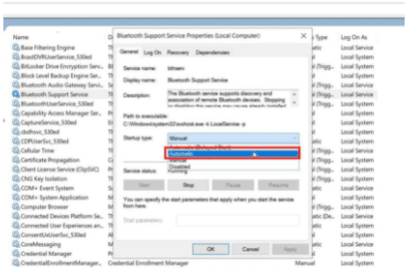
STEP 5: On the drop-down list for Startup Type, select Automatic. Then hit Apply and OK.
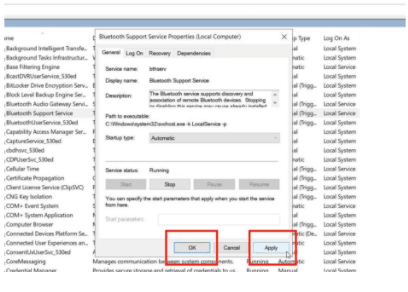
STEP 6: Restart your PC.
Once it restarts, try pairing your Bluetooth headphones and play some music through them to check if the issue is fixed.
Set your default playback device
You will need to make sure that your playback device settings are correct. Your headphones may be paired, but you may have forgotten to switch from your PC as the playback device, to your headphones.
Here’s how to set your Bluetooth headphones as the playback device:
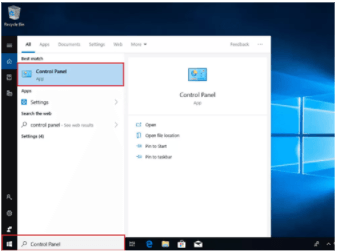
STEP 1: On the Windows Search Box, type Control Panel. Hit Enter.
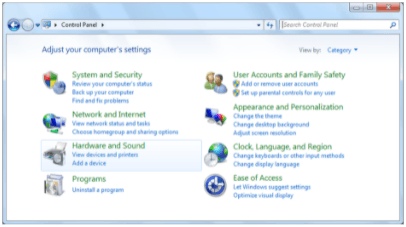
STEP 2: In Control Panel, you want to select Hardware & Sound.
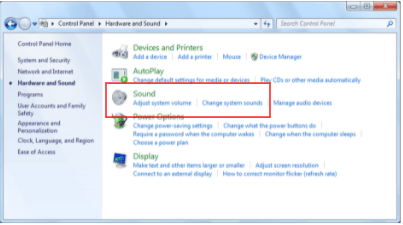
STEP 3: On the next page, select Sound.
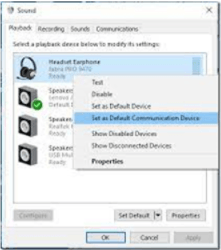
STEP 4: On the next box, select your Bluetooth headphones on the list and set them as the default playback device from the drop- down menu. Click Apply and OK.
STEP 5: Test your headphones by playing an audio file from your PC.
Check your volume levels
You will need to check that your volume levels and settings are correct otherwise you may not be hearing any or adequate sound through your headphones.
To do this follow these steps:
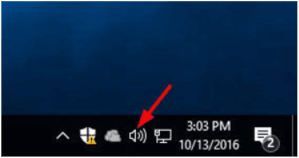
STEP 1: Right-click on the Volume icon on the lower-right corner of the desktop.
STEP 2: The volume adjust bar will appear.
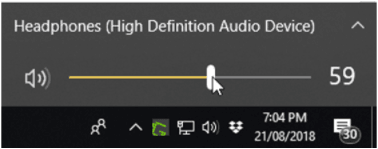
STEP 3: Move the bar to the right to raise the volume. This ensures that you have an adequate volume level blasting out of your headphones.
It is also possible to access your sound settings from this volume bar.
STEP 1: Right-click on the volume icon and a new box will appear.
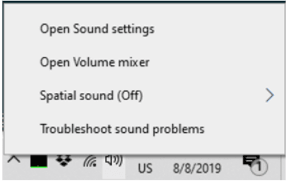
STEP 2: Click on Open Sound Settings and this will take you back to your Sound settings.
STEP 3: Follow the instructions on how to set your playback device above.
Update your Audio Driver
An outdated audio driver may be the reason that your headphones are not working properly.
Here’s how to check if your Windows Audio Driver is working properly and how to update it.
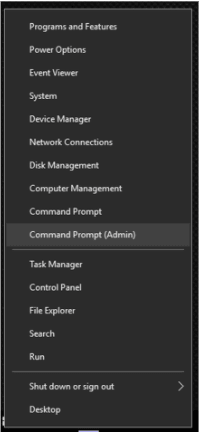
STEP 1: Right-click on the Windows icon and select Device Manager from the list.
STEP 2: In the new window, select Sound, Video and Game Controllers.
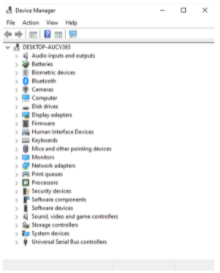
STEP 3: When you click on this a drop-down menu will appear as below.
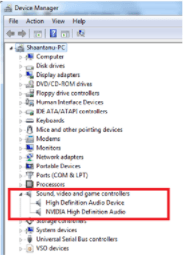
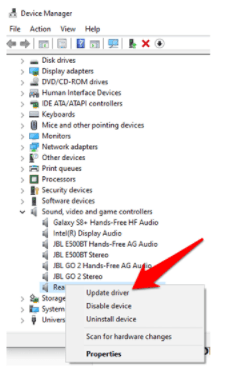
STEP 4: Right-click on your headphones and in the next box select update driver.
STEP 5: A dialogue box will appear asking how you would like to update the drivers. Select “Search automatically for drivers”.
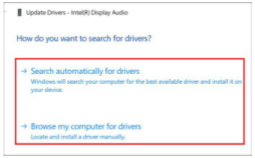
Windows will search for the latest driver software for your Bluetooth headphones.
Once it has found what it’s looking for, it will either update the driver or conclude that you already have the latest one.
Run your Troubleshooting tool
You can use the Windows troubleshooting tool to check for problems with your headphones.
STEP 1: Type Audio into your Windows Search Box.
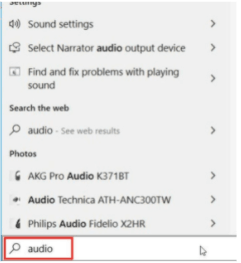
STEP 2: Select Find and fix problems with playing sound.
STEP 3: The Windows Audio Troubleshooter will be launched.
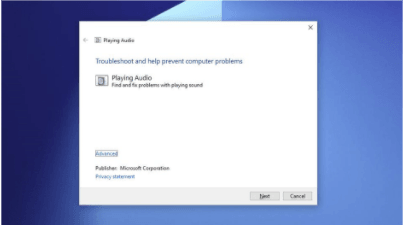
STEP 4: A drop down menu will appear. Select your headphones and click Next.
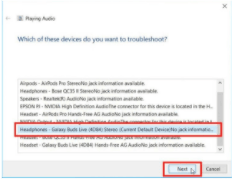
Once selected, the troubleshooter will run some tests and display any results or recommended actions. You can either choose to fix the issues or skip this step.
Hopefully this would have resolved your audio issues, but if it hasn’t, move on to the next fix.
Check audio problems in Device Manager
In order to check that all your settings and connections are enabled you will need to head to Sound, Video and Game Controllers settings. To do this, follow these steps.
STEP 1: Right-click on the Windows Start button then select Device Manager from the list.
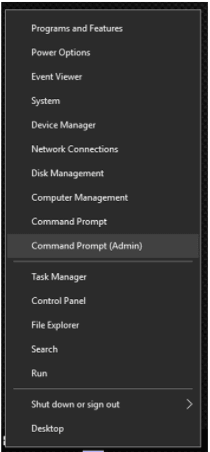
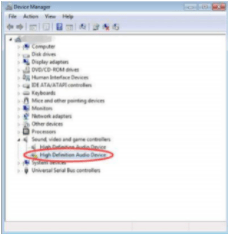
STEP 2: On the next screen double click on High-definition Audio Device.
STEP 3: If everything is working OK, you should have the option to “Disable Device”. If this section shows “Enable Device”, it means your headphones are turned off. If “Enable Device” is there, click on it and then press OK when it has finished.
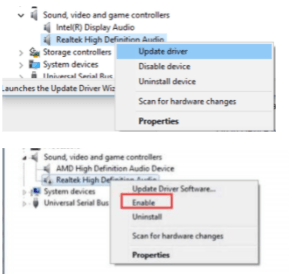
You can follow the same steps for your Bluetooth Headphones. Instead of selecting High- Definition Audio Device, select your headphones from the list.
Hopefully one of these fixes worked and you are now sitting listening to your fave tracks, podcasts or radio show!
If you are still experiencing problems, the issue may lie with your headphones or earbuds. If you would like to know the Best Wireless Earbuds for iPhone Calls in 2022, head over to our article here TOP 12 Best Wireless Earbuds for iPhone Calls in 2022.
If you only have sound in one earbud or earcup check out our recommendations to fix the issue here One earbud not working.

