Want high quality 3D, immersive sound without spending a dime? Then you need to read this article and learn how to enable Spatial Sound via Windows Sonic in Windows 10.
Windows Sonic is spatial sound software released by Microsoft to allow you to enjoy 3D sound with Windows devices and applications. It is designed to enhance sound quality and user experience. If your device or headphones haven’t got the best sound quality to begin with, Windows Sonic can help to improve the quality and audio experience. If you are a Windows 10 or Xbox user you can enable spatial sound through the Windows Sonic platform on your devices or headphones, and enjoy immersive, real-time, 3D surround sound. Perfect for movie buffs and gamers alike.
This feature is not restricted to certain brands, makes or models of headphones and devices. It can be used with any. While this feature will improve and enhance your sound quality, the extent to which it does this will depend on the quality of sound you started with.
Concerned about volume level on your hearing? See what the experts say about bass being bad for your ears Is Bass Bad for Your Ears? The Expert Opinion.
How to enable Windows Sonic on Windows 10
There are 3 primary ways of enabling Spatial Sound on your Windows device.
- Start Menu
- Through the Taskbar via Volume Icon
- Through the Taskbar via Sound Settings
Enabling Windows Sonic/Spatial Sound via the Start Menu
STEP 1: Click on Start and then open the Settings.
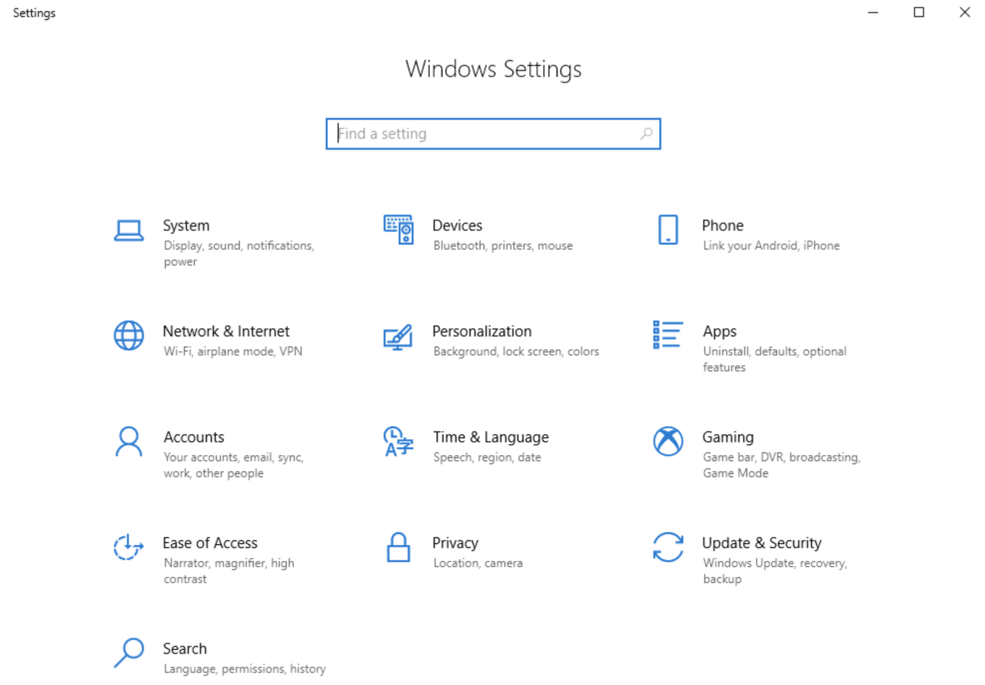
STEP 2: Once in Settings, go to System>Sound.
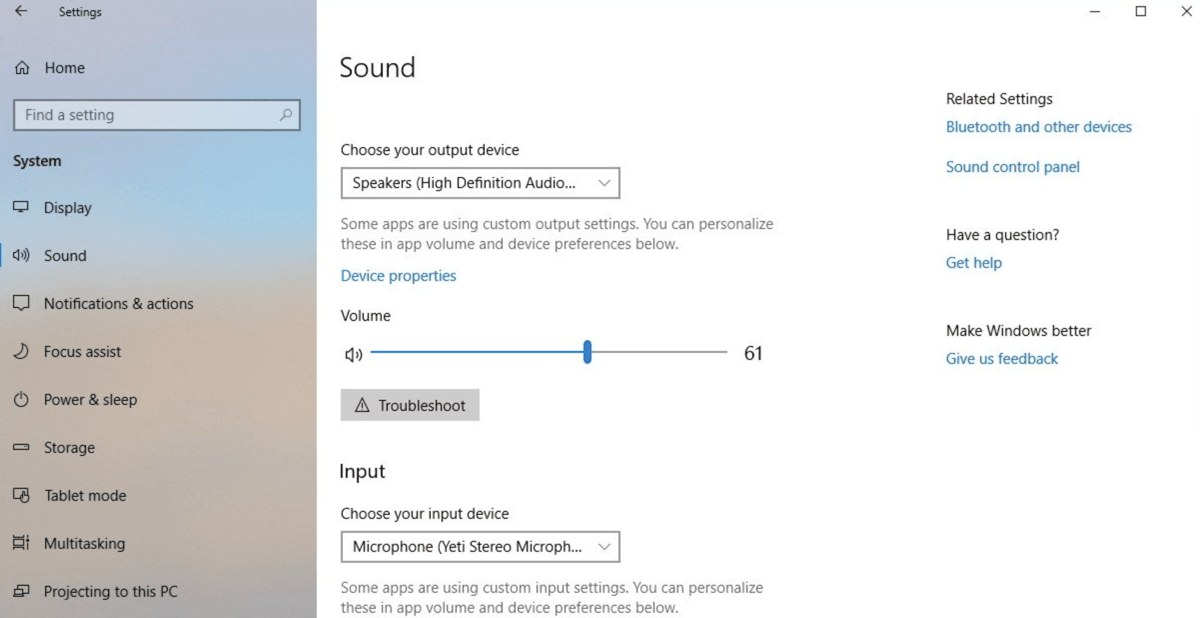
STEP 3: On your screen you will see Choose your output device. You will either want to select your speakers or headphones here.
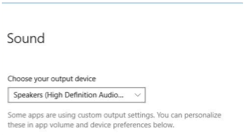
STEP 4: Click on Device Properties.

STEP 5: Below Spatial Sound you will see a drop-down menu. Click on Windows Sonic for Headphones to enable the feature.
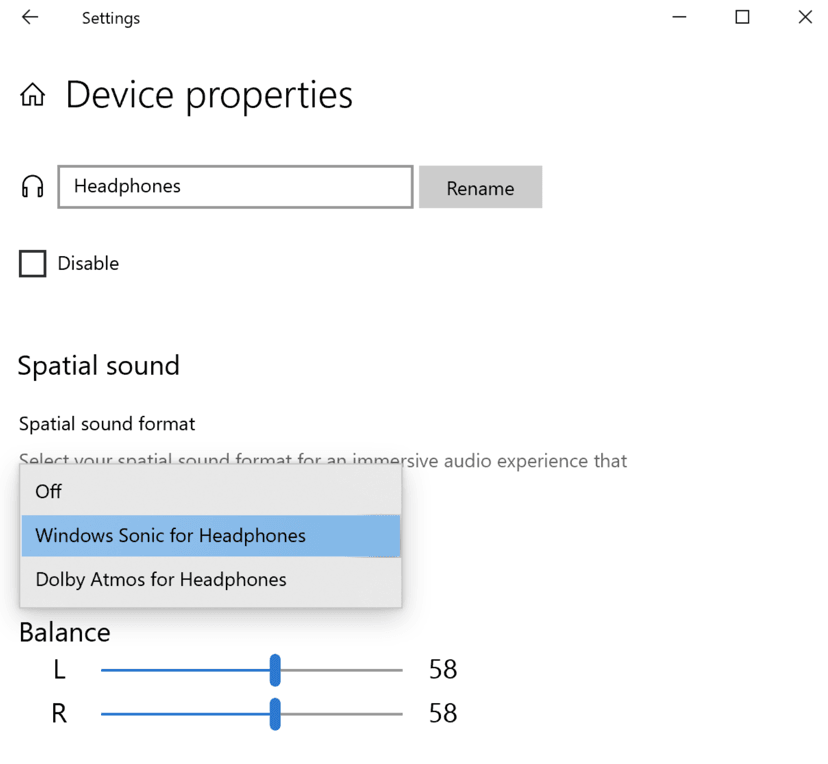
STEP 6: Click Apply to finalise and confirm.
Enabling Windows Sonic/Spatial Sound Using the Taskbar
Follow these super simple steps to start enjoying 3D sound now!
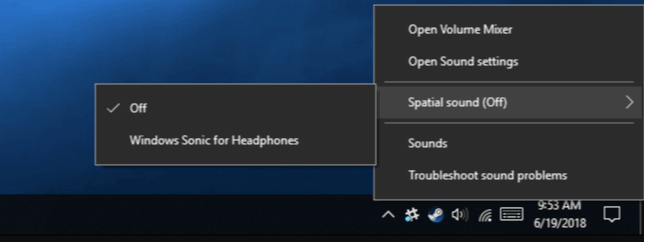
STEP 1: Right click on the volume icon on the taskbar.

STEP 2: Hover your cursor over Spatial Sound and in the left-hand box that pops up, click on Windows Sonic for Headphones to enable this feature.
Enabling Windows Sonic/Spatial Sound Through Sound Settings
STEP 1: Right click on the volume icon and select Open Sound Settings.

STEP 2: Click on Device Properties.

STEP 3: Below Spatial Sound, you will see a drop-down menu. Select Windows Sonic for Headphones to enable the feature.

How To Turn off Windows Sonic spatial feature
If for whatever reason you want to turn off the Spatial Sound feature then simply reverse the process by following these simple steps:
STEP 1: On the Taskbar, click on the volume icon.
STEP 2: Hover over Spatial Sound (Windows Sonic for Headphones).

STEP 3: In the box that pops up select Off to deactivate the feature.
If for some reason you don’t have the volume icon on your Taskbar, then follow these steps:
STEP 1: In the start menu, head to Settings.

STEP 2: Locate your Sound Settings again.

STEP 3: Once you are in your Sound Settings again, select the correct Output Device from the drop-down menu.
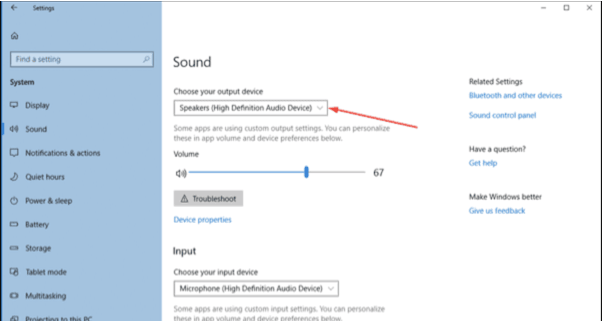
STEP 4: Click on Device Properties.
STEP 5: On the next screen, below Spatial Sound/Windows Sonics for Headphones, select Off in the drop-down menu to deactivate the feature.

How To Activate Windows Sonic on the Xbox One gaming console
For all you Xbox gamers out there, you will be happy to hear that Windows Sonic is a sure-fire way of taking team gaming sessions to the next level. Improve your audio and gaming experience in one foul swoop.
To activate the Spatial Sound technology on your headphones on the Xbox, follow these steps:
STEP 1: On the Xbox console, press the Xbox button. You will be taken to the Xbox guide.

STEP 2: Find and select Settings.
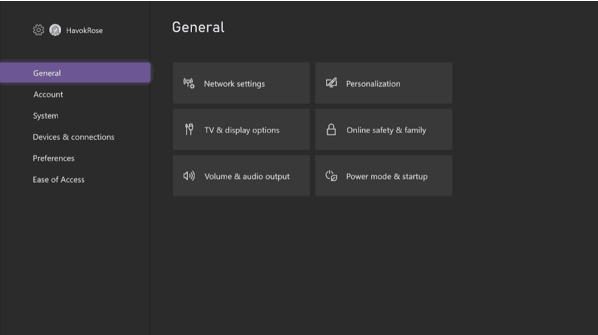
STEP 3: Click on Volume and Audio Output.
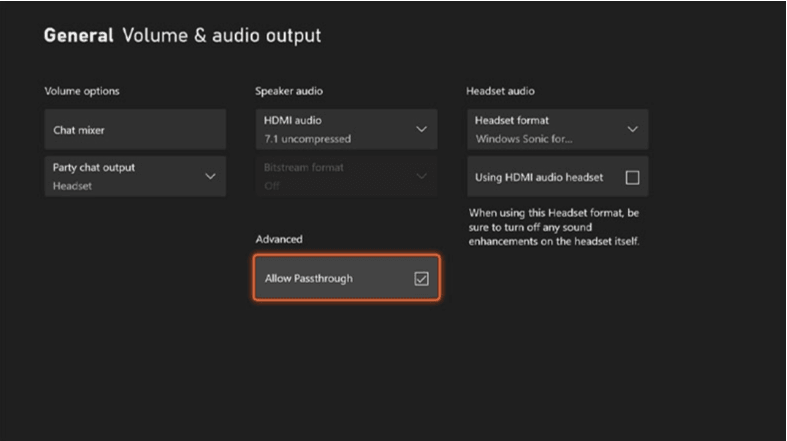
STEP 4: Under the Headphone Format option select Windows Sonic for Headphones.
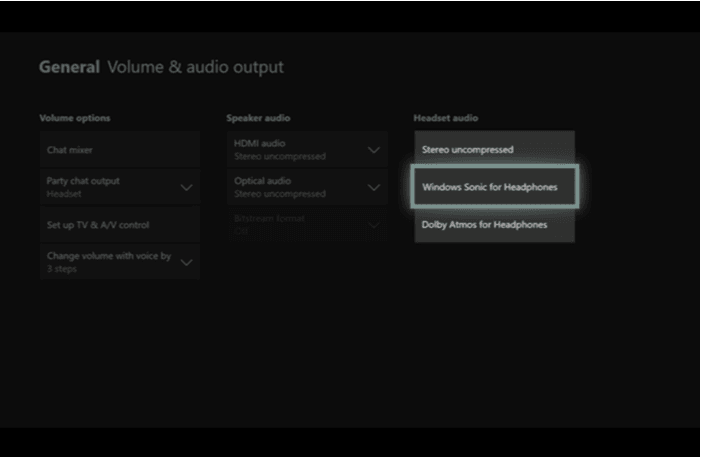
STEP 5: If you are using wired headphones connected to the HDMI or audio port, select the checkbox for Using HDMI or optical audio headset. If you are using wireless headphones, then you can skip this step.
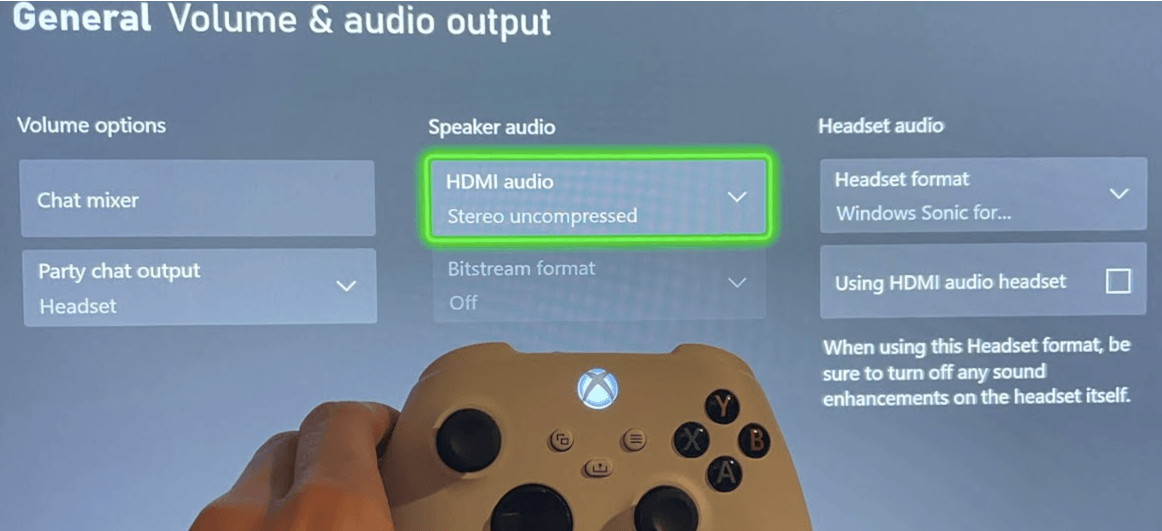
STEP 6: Click on Apply and Windows Sonic for Headphones is enabled on the Xbox One.
To Conclude…
Not all of us have the budget to buy the highest quality audio equipment. And this is where the Windows Sonic software comes in. Whether you are watching a movie, gaming, using You Tube or editing videos, enabling Spatial Sound will enhance and improve your audio-visual experience. It is free, convenient and as you can see from the steps above- easy to enable. No more excuses for bad sound quality!
If you have tried the steps above but are still finding that your Airpods are too quiet, you should find a fix here Why Are My Airpods So Quiet and How Do I Fix It?

