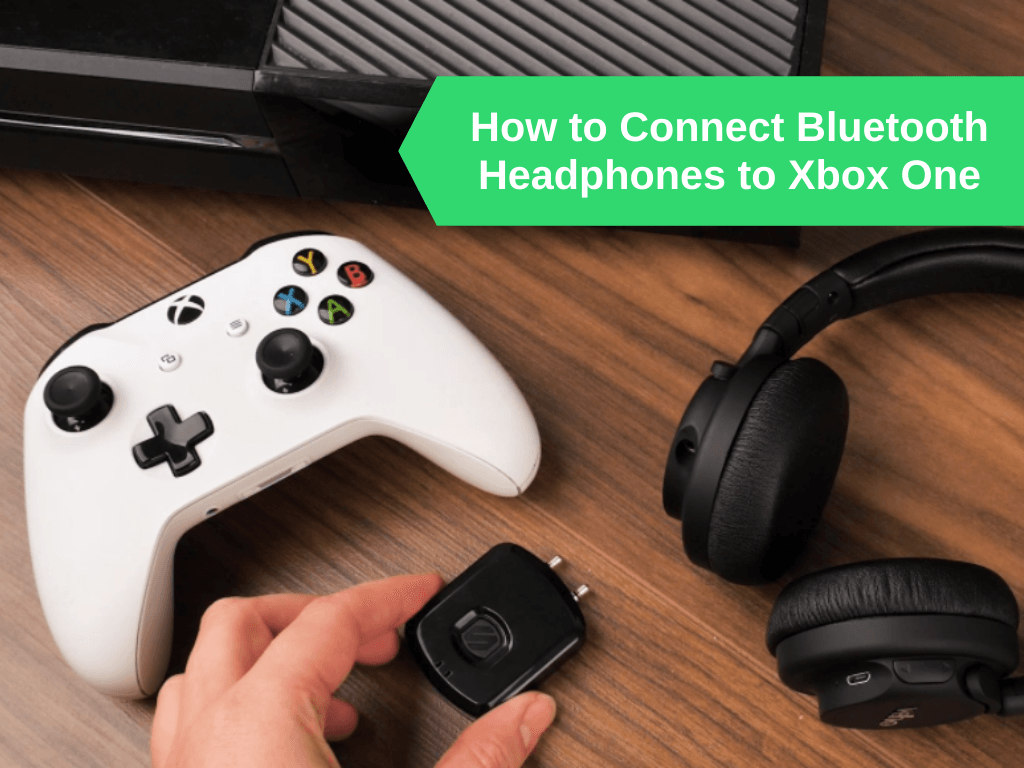
Having trouble connecting your Bluetooth Headphones to your Xbox? Read on to find the solution to getting connected and gaming ASAP. Whether your headset is Xbox compatible or not, we have the fixes you need.
Whether you are a seasoned Xbox user or a newbie, frustrations with wireless headphone connectivity is a common issue.
This is especially true if you are attempting to connect Bluetooth wireless headphones to your console. Why? Because the Xbox uses its own in-house wireless system- the Xbox Wireless.
The reason behind this is that Bluetooth uses a 2.4Ghz Radio Frequency and to achieve low latency and improved audio experience a higher radio frequency is needed. The Xbox Wireless uses a higher Radio Frequency to give you a better user experience.
But this doesn’t mean your non-Xbox Wireless Bluetooth headset is useless. There are easy ways to connect these headsets to your console and I will be showing you them here.
There are Xbox specific headsets that either use a wireless dongle attached to the controller or connect automatically to the console. These headsets do not usually use Bluetooth technology. There are hybrid headsets that use both Xbox Wireless and Bluetooth. These headsets will only work on the Xbox. They are not compatible with PS4, Nintendo or Bluetooth devices.
Head over to Amazon for the best Xbox compatible headsets of 2022.
If your headset is not Xbox compatible, don’t worry. We will still be able to help you connect them. You may need to invest in some Bluetooth enabling devices and this article will talk you through some of these as well.
If your headset is Xbox compatible then this next part is for you.
How to Connect Compatible Xbox One Wireless Headsets
If you are a first time Xbox Wireless user then this step-by-step explanation will make the process painless.
STEP 1
Turn your headphones to ‘pairing mode’. This usually involves holding down the power button until the LED light is on.
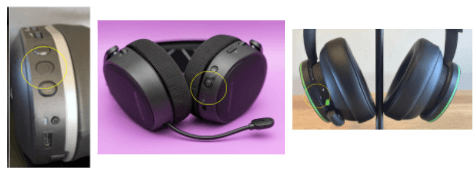
The power button can be found on the back of the earcups of your headset. The location will be slightly different depending on the headset.
Below from left to right: the power button for the Turtle Beach Stealth 700 gen 2, the Steel Series Arctis 9X and the Microsoft Xbox Wireless headset.
STEP 2
Turn your console on by pressing the console’s power button.
STEP 3
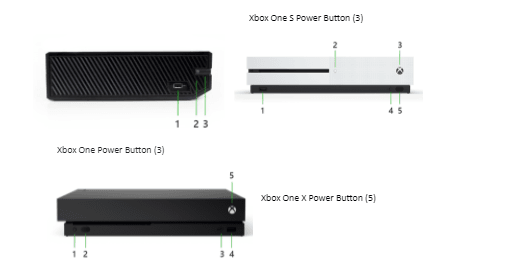
Locate the Pairing Button on your Console.
STEP 4
Press the Pairing Button until the LED light flashes. This indicates that your console is ready to be paired.
STEP 5
Go back to your headset and press and hold the Connect Button until the LED light flashes. Your headset is now ready to be paired.
The connect button can be found with the power button on most headsets. On the Microsoft Xbox One headset, the power and pair button are the same button.
STEP 6
Allow a few seconds for the LED lights on both devices to steady. You should hear a tone from both the console and the headset to confirm that the devices have been paired. If the pairing has been successful, you should start hearing the game audio immediately.
Connecting Xbox compatible headsets should not be complicated. If you continue to experience difficulties, consult your user manual or contact the manufacturers. You could have a faulty headset.
Connect Non-Compatible Bluetooth Headphones to Xbox One
It should be noted that some features of your Bluetooth headphones may not work with your console. For example the microphone may not work properly and you won’t have access to ChatMix features.
However, it is possible to connect your headphones and have full use of the features. There are 4 primary ways to connect your headset to your console:
- Utilise your PC connection
- Connect via your TV
- Use the Xbox App
- Use Bluetooth transmitters
Utilise Your PC connection
By connecting your console to your PC, your PC becomes the end user making your connectivity issues a thing of the past.
Windows PC’s and Xbox One are both powered by Microsoft so configuring a connection should be easy.
Before you begin you need to make sure that both your PC and Xbox are connected to the same network. You will also need to use the Xbox Console Companion app. This app should already be installed on our Windows PC. If not you can simply download it here.
To connect your Xbox One console to your Windows PC follow these steps:
STEP 1
Access the Xbox Console Companion app by signing up or signing into your Microsoft account.
The sign in screen will look like this:

STEP 2
Enable the Xbox One app on your PC by clicking the Connection icon located at the Xbox app’s left-hand menu.
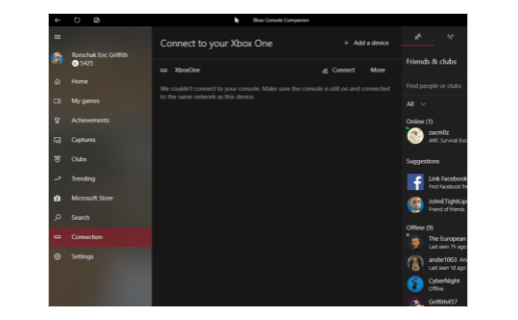
You will see Connect to your Xbox One window. In its top-right, you will see the Add a device icon.
STEP 3
Click on the Add a device icon.
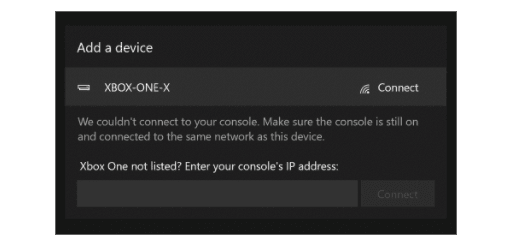
Windows will automatically search for your Xbox One console. Once the console is detected, click the Connect button and you are ready to go.
If your PC is taking a long time to find your console, you can type in the IP address of your console. This can be found through your console itself.
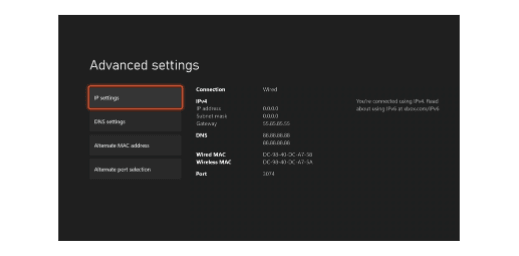
How to find your Xbox One’s IP address
- Make sure your Xbox One console is on.
- Push the Xbox home button on your controller.
- Select “Settings.”
- In “Settings” select “Network.”
- Select “Network settings” and “Advanced settings.”
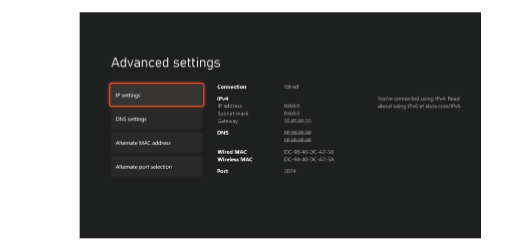
- In “Advanced Settings” select “IP Settings.” This will allow you to view your IP address.
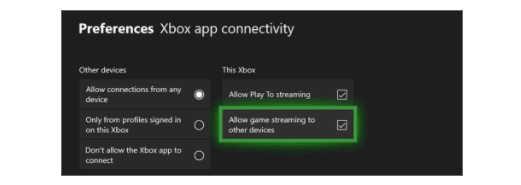
If you’re still having trouble connecting:
- Go to your Xbox settings.
- Choose Devices & Streaming.
- Go to Devices and connections.
- Enable Allow Play To streaming, Allow game streaming to other devices, and Only from profiles signed in on this Xbox.
Check if your Xbox is listed in the Connections tab.
Your console should be listed. Simply follow the steps above to connect to it. Now your Xbox One is connected to your PC, you can start gaming with your Bluetooth headset through your PC.
Connect via Your TV
This method follows the same principle as connecting your headset via your PC. Because the TV is the end user, by connecting your console to your TV, you can then connect the headphones to the TV and play the audio that way.
One major downside of this method is that you won’t be able to use your headset microphone.
Connecting your console and your TV is easy. Just follow these steps:
STEP 1
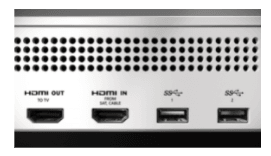
Locate the HDMI port at the back of your console.
STEP 2
Plug the HDMI cord included with your Xbox One or one you have lying around the house (just make sure it works first!)
STEP 3
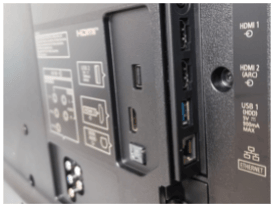
Locate the HDMI port at the back of your TV and plug in the other end of the cable into it.
STEP 4
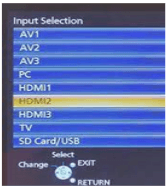
Use your TV remote to select the correct input source. This will depend which HDMI port you are plugged into 1, 2 or 3.
STEP 5
Connect your Bluetooth headphones to your TV.
To do this, find Settings > Remote and Accessories.
Put your headphones into Pairing mode. Your headphones should then appear as a Bluetooth device. Instructions will vary depending on your TV. But once connected, you are ready to begin gaming.
Use the Xbox App
This method is only useful to use for party chat. You will not be able to hear the game audio through your wireless headphones.
To use your headset with the Xbox One for party chat, follow these steps:
STEP 1
Connect your Bluetooth headset to your mobile.
STEP 2
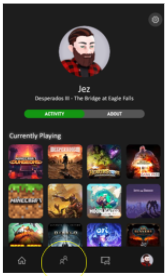
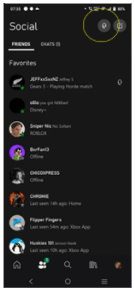
Go to the Xbox One App and click on the social icon.
STEP 3
Click on the headset icon to start a party.
STEP 4
Allow Xbox to record audio by clicking Yes.
STEP 5
This will open the party chat screen. You can invite your teammates and enjoy using the party chat app.
Use Bluetooth transmitters
Bluetooth transmitters allow you to bypass the Xbox restrictions on using your headphones with it. You won’t be able to use your microphone but will have full access to other features.
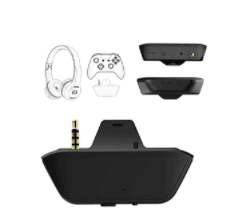
If you want to try using a Bluetooth transmitter, just follow these steps:
STEP 1
Switch the transmitter on by pressing the power button for about 3 seconds. Alternatively, wait until the LED lights start flashing. This will depend on the transmitter you use.
STEP 2
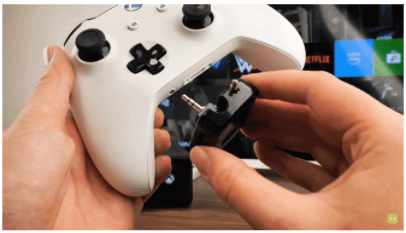
Plug the transmitter into the port on your Xbox controller.
STEP 3
Turn your headphones on and put them into pairing mode.
STEP 4
Press and hold the multifunction button on our Bluetooth transmitter for around 5 seconds. This will put the transmitter into pairing mode with your headphones.
STEP 5
Check that the LED light is glowing steadily and not flashing. This indicates that your transmitter and headphones are paired.
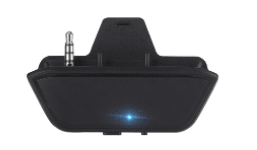
If you would like to invest in a Bluetooth transmitter Amazon has some great products. Check them out here today.
The End Game…
Connectivity issues are a common problem amongst the gaming community, but hopefully one of these fixes has solved all of your connectivity issues.
If not, it may be time to check the instruction manual that came with your headphones. There may be specific requirements or fixes recommended by the manufacturers to connect your headset to your console.
If you are experiencing issues with the microphone and yours is a compatible headset, it could be time to see if it needs a fix. Head over to our article giving you step-by-step instructions on how to fix problems with your microphone.
