If you are having issues connecting your Poly headset, then you have come to the right place. We have researched different Poly headsets to bring you the ultimate Bluetooth Pairing Guide.
Poly, formerly Plantronics are prolific manufacturers of headsets, headphones and single ear earbuds primarily designed for office and conferencing activities. They currently have 5 different series of their products:
- Backbeat
- Voyager
- Explorer
- M-Series
- Pulsar
Each of these products fall into 3 different categories:
- Headsets that have one button for call control and power.
- Headsets that have an ON/OFF switch.
- Headsets that have a sliding ON/OFF and Bluetooth toggle.
Depending on which category your headset falls into, you will need to follow different steps to pair your headset with your PC, laptop or device. But don’t worry, we have broken this down into easy- to- follow steps to get you connected ASAP!
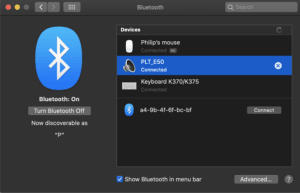
Whatever model of Poly headset you have, the first step is to turn on the Bluetooth on your device. You will find this in the Settings>Bluetooth. Move the slider to switch your Bluetooth on. This is where you will find your headset once it is connected and paired with your device.
Any Poly headset will show on your device as “PLT” followed by the model number (with the exception of the Pulsar 260 model).

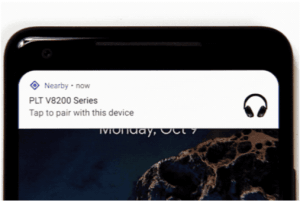
During the pairing process, you may be prompted to enable the pairing by your device and to enter a passkey. If this is the case enter 0000.

Explorer 220, 230, 320, 330, 340, 350, 360, 370, 380, 390 / Voyager 520, 815, 835, 855 / Discovery 610, 640, 645, 655, 665, 925, 975
- STEP 1: Start with your headset turned off. Press and hold the call control button until the LED light will flash blue. Continue to hold the button until the light starts flashing red and blue.
- STEP 2: Release the button and set the headset aside. Follow any pairing instructions from your phone or device.
M100, M1100 or Explorer 210, 240, 242, 243, 245 or 395
- STEP 1: Turn your headset on. Press and hold the call control button until the LED light starts flashing red and blue.
- STEP 2: Release the button and place the headset aside. Follow the instructions on your phone to complete the pairing process.
Voyager Pro, Pro+ or Backbeat 903 or 903+
- STEP 1: Start with your headset turned off. Press and hold the power button until the light starts flashing red and blue. Release the button and set the headset aside.
- STEP 2: Follow any instructions to complete pairing given by our phone or device.
Voyager 510
- STEP 1: Press and hold down the call control button and the volume up button at the same time. When the LED light starts flashing red and blue, release the buttons.
- STEP 2: Follow any instructions given by your phone to complete the pairing.
Pulsar 590/590e or 590A
- STEP 1: Start with your headset turned off. Press and hold the call control button until the LED light flashed red and blue. While this is happening you also want to power on the headset using the power button.
- STEP 2: Once the LED light begins flashing, release the call control button and set your headset aside. Follow any instructions to complete the pairing process given by your phone.
If you are using a Universal Adapter with this model, once the LED light starts flashing red and blue on the headset, power up the adapter. To do this press and hold the adapter pairing/connect button until the LED light on the adapter starts flashing. Once the headset and adapter are paired, both LED lights will flash blue.
Pulsar 260
STEP 1: Start with the headset on. Press and hold the mute/play/pause button and the power on/off/pairing button at the same time until the LED light flashes red and blue. Then release the buttons.
STEP 2: Check the Bluetooth devices showing in the available devices and select your headset from the list if it hasn’t connected automatically. This model will show as 260 Plantronics in the list of available devices.
Discontinued Headsets
M2500
- STEP 1: Start by turning your headset on. Press and hold the call control button while also rotating the multi-function dial upward (away from the LED light) until the LED light flashes red and then turns green.
- STEP 2: You will be prompted for the passkey, so enter 0000.
M1000
- STEP 1: Turn your headset on. Press and hold the volume/mute switch until the LED light starts flashing. Release the button.
- STEP 2: Follow any instructions from your device to complete the pairing process.
M1500 with the A500 adapter
- STEP 1: Turn the headset on and make sure the adapter is off. Press and holf the mute/volume dial on the hedset until the LED light begins to flash.
- STEP 2: On the adapter press and hold the blue power button until the LED light starts to flash red.
- STEP 3: Both the headset and adapter should emit a paired tone when paired successfully and the LED lights will switch off.
- STEP 4: Follow any instructions given by your device to complete the pairing process.
Note that for the M1000/M1500 the passkey can be found on the green PC board behind the battery. To find this. Follow these instructions:
- STEP 1: Remove the battery cover from the headset.
- STEP 2: Remove the battery itself.
- STEP 3: On the green PC board you will see a letter followed by a 4-digit pin. You want to enter this pin into your phone when prompted for the passkey. Not 0000 like the other models.
Discovery 640, 645 or 640e, 655 or the 665
- STEP 1: Start with the headset turned off. Press ad hold the silver call control button until the light flashes blue. When the lights starts flashing red and blue, you can release the button.
- STEP 2: Follow any instructions on your phone or other device to complete the pairing process.
Still Having Issues?
Hopefully this is not the case and one of these sets of instructions has got your headset paired and connected. Are you connected but there is no sound? Follow these instructions to solve the problem. Great sound but only on one side? Check out some of these solutions and get back to doing what you do best- living life!

