Struggling to use your Apple Earbuds as a Mic on your PC? This easy step-by-step guide is here to solve your problem!
Apple products are some of the best when it comes to audio. The only complaint continues to be connectivity and compatibility issues with non-apple products and devices. If you are trying to use your Apple headphones or Airpods with your PC, then connection should be simple. But if you have run into some issues, then the following guide on how to use Apple earbuds as a mic on your PC, will help solve your connectivity and audio issues.
What you will need to use your earbuds as a mic:
- Earpods with 3.5mm Plug
- Lightning to USB-A Connector
- Audio Splitter
1.Earpods with 3.5mm Plug
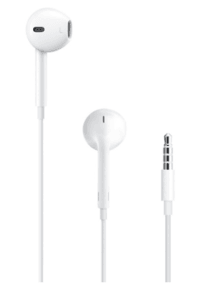
Only available for wired Apple earbuds that come with the 3.5mm plug. If not, you will need a lightning connector.
2.Lightning to USB-A Connector
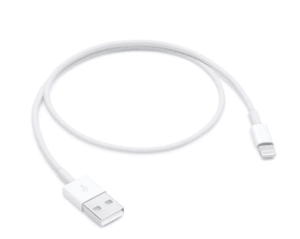
This can be used with Apple Airpods.
3.Audio Splitter
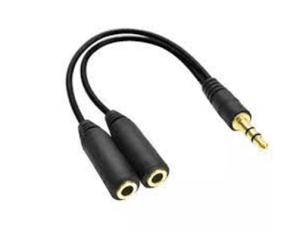
This can be used if you want to use 2 sets of headphones.
How to Use Your Apple Earbuds as Mic on PC
There are 2 primary ways you can use your earbuds as a mic.
- Connect your earbuds to your PC
- Configuring the audio settings
Connecting your earbuds To Your PC
-
STEP 1:
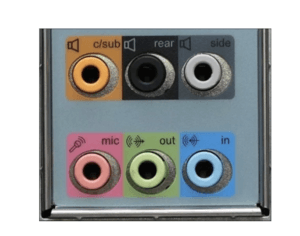
Locate the recording slot
If you only have 1 audio port on our PC, then you can simply plug your earbuds into this. But most PC’s will have 2 slots. One will be for headphone audio and the other for recording/mic.
If you want to use Apple earbuds as a mic then you want to plug them into the mic slot.
-
STEP 2:
Plug your earbuds in.
Now you need to complete phase 2.
Configuring Audio Settings
-
STEP 1:
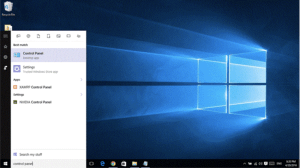
Launch the control panel
There are a couple of ways to do this but the easiest is typing “control panel” in the search box on the bottom left of your screen.
-
STEP 2:
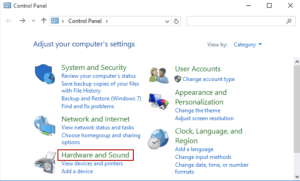
Locate “Hardware and Sound”.
-
STEP 3:
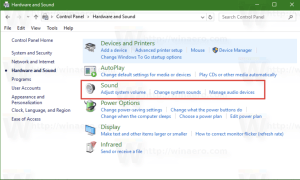
Click on the “Sound” settings or “Manage Audio Devices”.
-
STEP 4:
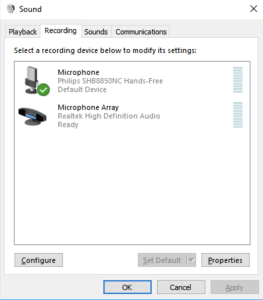
On the “Sound” window, click on the recording tab.
-
STEP 5:
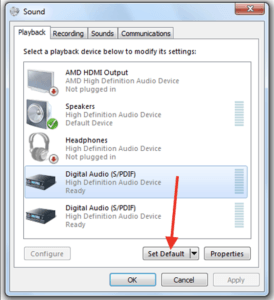
You should see your Apple Headphones listed as High Definition Audio. Left-click on them and set them as your default.
NB: Your headphones should have a green tick indicating that they have already been detected by your computer.
-
STEP 6:
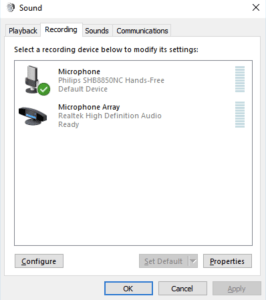
Now you need to enable your earbuds as a mic. Staying in the recording tab, locate your headphones from the list again. Once selected click the “Properties” button.
-
STEP 7:
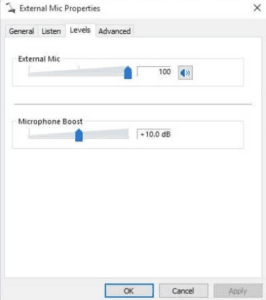
On the “Microphone Properties” window, click on the “Levels” tab.
-
STEP 8:
Adjust the “Microphone Levels” and the “Microphone Boost” to suit your preferences.
-
STEP 9:
Click Apply and OK to save the changes.
- STEP 1:
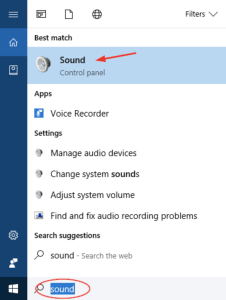
Left-click the Windows icon at the lower left of the screen, press the Windows key or type sound settings in the search bar at the bottom left of your screen.
- STEP 2:
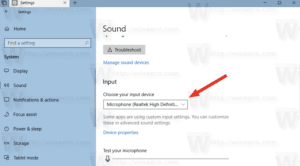
In “Sound settings” you want to head to “Choose your input device”, and select your Apple headphones from the drop-down menu.
How to Use Your Apple EarBuds as Mic for Zoom
If your PC has registered your Apple headphones as the default mic, then they should connect automatically. In the event they do not, follow these steps.
STEP 1:
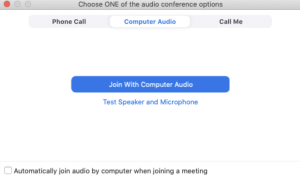
Once you have joined a Zoom meeting, a window will pop-up and ask you to join or test your audio. Click on “Test speaker and microphone”.
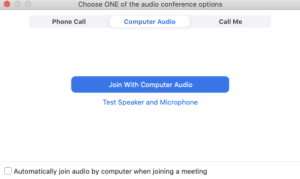
STEP 2:
A tone will be played to test your audio. If you don’t hear a tone simply click on “No” or use the drop down menu to select your headphones until you can hear the ringtone. Then move on to the microphone test.
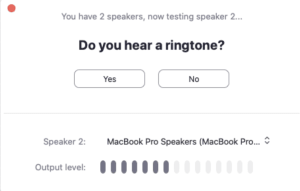
STEP 3:
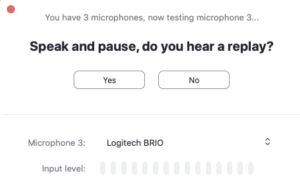
For the microphone test, try speaking normally and you should get an audio replay. If you don’t hear anything select “No” or choose your headphones from the drop down menu. Once you can hear yourself, click “Yes”.
STEP 4:
Click “Join Computer Audio” to use your headphones as a mic with Zoom.
Using Your Apple EarBuds as Your Mic for Slack
If your PC has already registered your Apple headphones as the default mic, then they should automatically recognise your heapdhones. In the event this doesn’t happen, follow these steps.
STEP 1:
Start a call on Slack by pressing the phone icon.

STEP 2:
Once on the call, click on “Settings”.

STEP 3:
In the drop-down menu below “Audio Settings”, select your headphones.
STEP 4:
Speak normally and if the metre below the drop down moves, then your headphones are working.
Using Your Apple Airpods as a Mic
Apple Airpods may be the best earbuds for phone calls (insert internal link to article here), but because they are wireless, the process for connecting them to your PC is slightly different. Follow these steps if you are having trouble connecting your Airpods to your PC.
STEP 1:
Locate “Hardware and Sound” in “Control Panel”. Follow the steps above to get there.

STEP 2:
Click on “Sound” or “Manage Device Settings”.

STEP 3:
In the Sound window click on the Recording tab.

STEP 4:
Left-click on your Apple Airpods so they are highlighted (usually listed as High Definition Audio) and then click on “Properties”.

STEP 5:
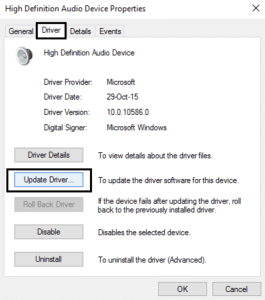
On the microphone properties window, click on the Driver tab and select Update Driver to see if an update is required.
Drop the mic…
On your audio and connectivity issues by following the steps above. If you are experiencing problems with sound quality or one earbud not working, then head over to our troubleshooting guide AirPods Mic Not Working? Try These 6 Tips for Apple Airpod and earbud sound issues.
